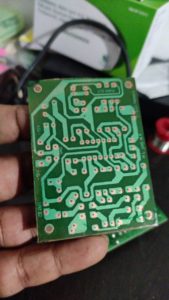
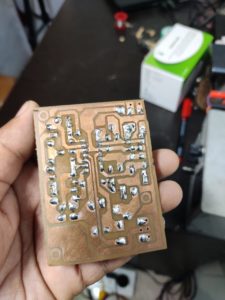
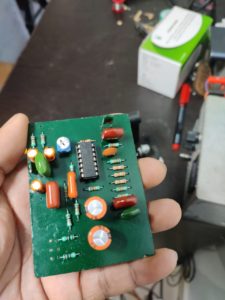
You all know about the printed circuit board that is also known as PCB. there are two players in there in common PCB bottom layer and upper layer. The bottom layer is furnished with the green color ( solder masking) and the upper layer is furnished with electronic components layout. In this article, I would like to share some information about How to Green Mask PCB at Home.
Normally green masking is a very expensive job. If you are a beginner in electronics green masking is too much costly. For green masking, we cannot do with normal paint or normal ink. The special types of INk or color are used for printed circuit board masking.
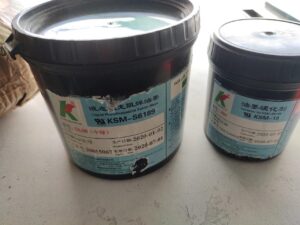
For green masking my local PCB, I bought a liquid photo imageable ink from Delhi because I am an Indian. The bite product is made in China. you can also order from the aliexpress or any other Chinese website. For 1kg I got a photo imageable ink with hardener. Does combo pack I give 1100 rupees Delhi company.
I am also a beginner in PCB green masking. in past days I believe that normal metallic paint for normal screen printing paint is enough for masking the PCB. But that was wrong. Because the availability of liquid photo imageable in India is rare. That’s why I go through the screen printing in or metallic coating ink. In this way, I didn’t get the perfection of green masking.
At last I understood how to clean mask a copper clad the steps are following.
Before start to clean masking we need to play what are the instruments need to to green masking.
Steps to Solder masking PCB
- Green masking in different type UV curable in liquid photo imageable in and dry photo image link, epoxy resin.
- Training screening mesh you can get this from the local market.
- Squeegee.
- Photo coat or sensitizer.
- And and ammonium dichromate.
First, you need to take the screen and applying the photo coat or emulsion and ammonium dichromate mixed to the surface using a squeegee.
You must know that this process should be carried in your sunlight area or darkroom. Because the light will dry you in very fast.
After uniformly spreading the photo cord to the screen you need to keep the screen in front of a fan for air dry.
After the air-drying screen, you need to take the layout of the PCB to the butter sheet and cutting the proper size and stick on the mesh surface.
Exposed to the sunlight to about 10 to 20 seconds not more than 30 seconds that will completely dry the ink.
After that remove the layout and wash with high pressure water.
After proper washing with the mesh, you can see the layout done. then the next step is to try the screen and use it for green screen masking by applying the ink upon the screen then by using a squeegee you need to pull the squeegee and applying the ink will stick on the PCB.
Muito interessante, amigo! Muito obrigado…
Renato frança – São Paulo – Brasil.