
Join us as we make a recycled DIY cardboard puppet theater using a process kids can recreate on their own or use for inspiration. Complete with elements and puppets inspired by author and illustrator Celestino Piatti!
Use the links below to jump straight to a specific topic of interest in this article…
Ladies and gentlemen, the Piatti Puppet Theater would like to welcome you to today’s production! At this time we invite you to silence your devices, grab a paintbrush, and join us for an afternoon of creative art-making. Audience participation and improvisation are encouraged, and we do hope you enjoy the show!
Like a scene straight out of a fairytale, this magical little theater is nestled among the leaves of a sunny secret glade. Made from recycled boxes and cardboard tubes, it’s a DIY project that promises hours of imaginative art-making and creative bookish play for your little ones – all inspired by Celestino Piatti’s fantastic stories.

If you have ever had the pleasure of flipping through one of his books, you’ll most likely instantly recognize the casts of colorful characters and the confident, boldly-lined artistic style of author and artist Celestino Piatti.
As a Iittle one, I was captivated by the illustrations in his children’s books Animal ABC and The Happy Owls. Later, while studying architecture and graphic design, I’d rediscover Piatti’s art – a massive body of work, filled with masterfully-designed posters, book covers, illustrations, and, of course, his children’s books.
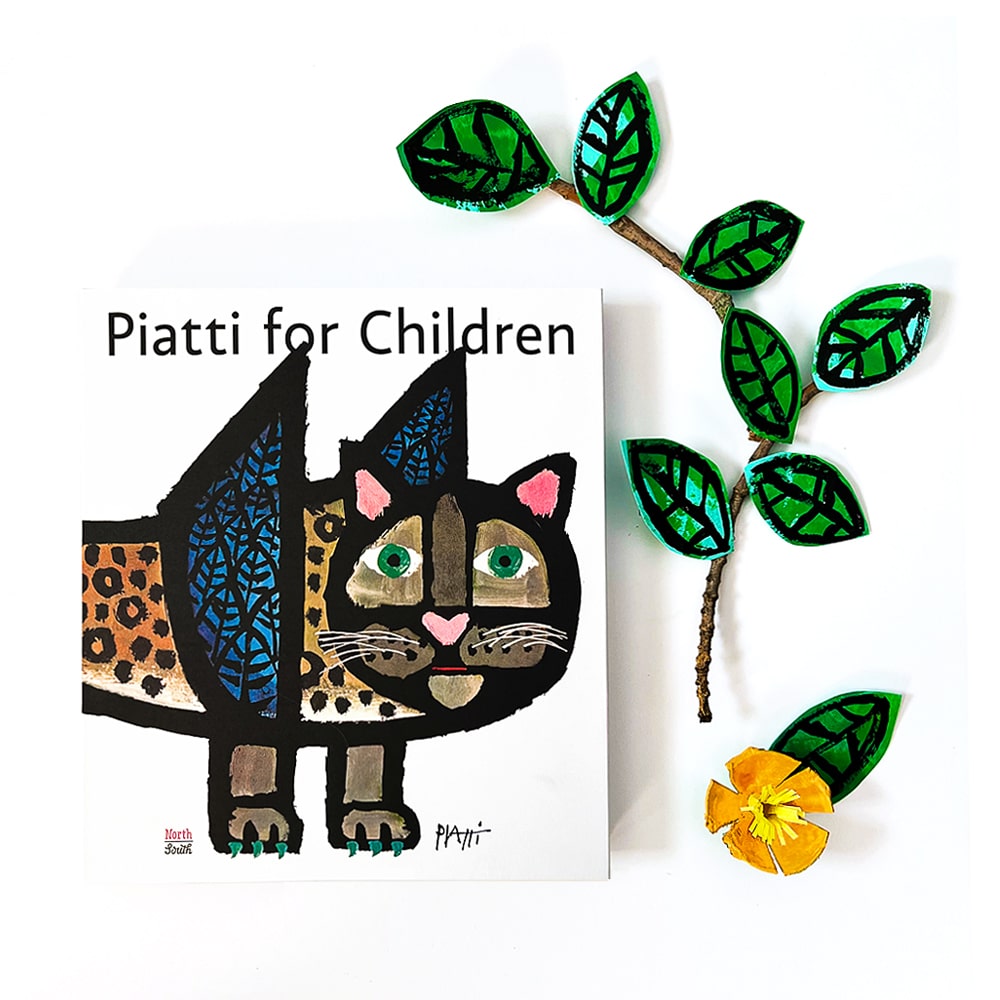
A few months ago I was sent an advance copy of a new collection of his work, Piatti for Children, and I have to tell you, I’ve already poured through it more times than I can count (you can preview it here on Instagram!). There’s a visual treat on every single page, and it’s absolutely chock full of stunning illustrations to inspire artists young and old alike.
I’m over-the-moon excited to share that you can find the new collection, featuring Animal ABC, Barbara and the Dormouse, The Happy Owls, The Little Crayfish, Circus Nock (The Circus Family), The Golden Apple, and Holy Night, over at NorthSouth Books.
One thing having all of the stories gathered into a single book made instantly clear was that Piatti and I have many shared loves beyond a passion for graphic design.
Through his stories’ themes and the lovingly crafted details of his work, it’s obvious he spent quite a bit of time observing and enjoying nature. His stylized woodland scenes and vast menagerie of whimsical animals provided instant inspiration for our own puppet theater project.
For more projects inspired by Celestino Piatti’s work and the upcoming release of Piatti for Children, visit our Piatti-inspired spring landscapes and garden art project (featuring another fabulous animal from his ABCs).
CARDBOARD PUPPET THEATER SUPPLIES:
DIY STICK PUPPET SUPPLIES:
OPTIONAL SUPPLIES:

We made the main base of our puppet theater out of the bottom of a recycled cake box, but you can use a regular cardboard box or whatever you have around that’s similar instead.
Draw the shape you’d like your stage opening to be (a rectangle was easy!) and use an X-Acto knife or scissors to cut it out.

We wanted our puppet theater to look as if was surrounded by some of Piatti’s wonderfully bold trees and foliage. We cut a paper towel in half to use as dimensional tree trunks that we covered with bold lines of “bark”.
We also cut a strip of green paper to become the bushy shrubbery covering the front of our theater and made a decorative roofline from a leftover piece of the cake box. With the remaining cake box scraps, we cut two rounded shapes to use in building our treetops.
You can modify these elements any way you prefer, and there are many opportunities here for little artists to recreate their own surroundings or try a different artistic style or medium. Maybe you’d prefer your puppet theater to be surrounded by a rainforest canopy, or decorated with a border of bright spring flowers!
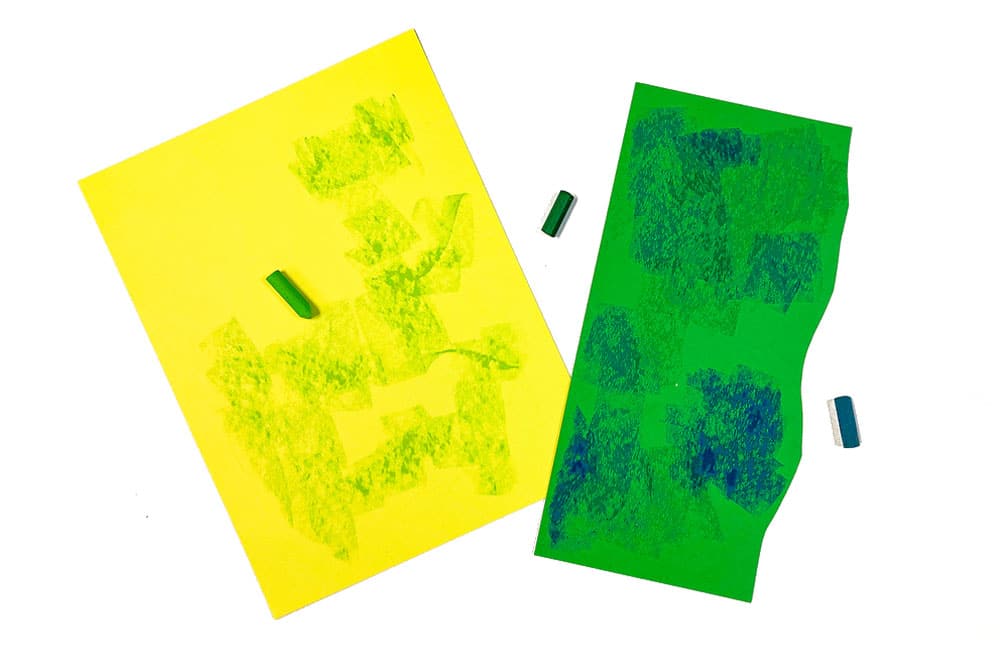
If you thumb through the different stories Piatti wrote, you’ll notice that he used many different mediums to create rich layers of texture in his illustrations. Experiment with the supplies you have to create similarly textured papers you can cut your treetops from.
We found that rubbing oil pastels across our colorful papers created lovely textures and layered color combinations. By changing the way we used the pastel we could create different effects. Press down hard with the tip of the oil pastel for rough, defined lines and deep colors that bring out the surface of the paper. Or drag the side of the oil pastel along the paper gently for softer marks.
We also tried out different colors on different papers. What color palette do you prefer for your trees?

We used a dry brush to paint the heavy outlines of our leaves onto our colored papers. If you have one, a bingo dauber is a wonderful tool to use to create big, bold lines.
Once dry, cut out your leaves.

Grab the two rounded shapes you cut from the box scraps – we’ll be gluing our leaves on top of them to build our treetops.
Use a glue stick to paste the leaves onto each round treetop base. Once you’ve created a lovely, layered treetop dense with colorful leaves, use craft glue or a hot glue gun to paste the treetop piece onto the top of your cardboard tube tree trunks.

It’s time to put all of the pieces of our theater together! Use a hot glue gun or craft glue to affix your shrubbery, roofline, and trees to the sides of the stage.

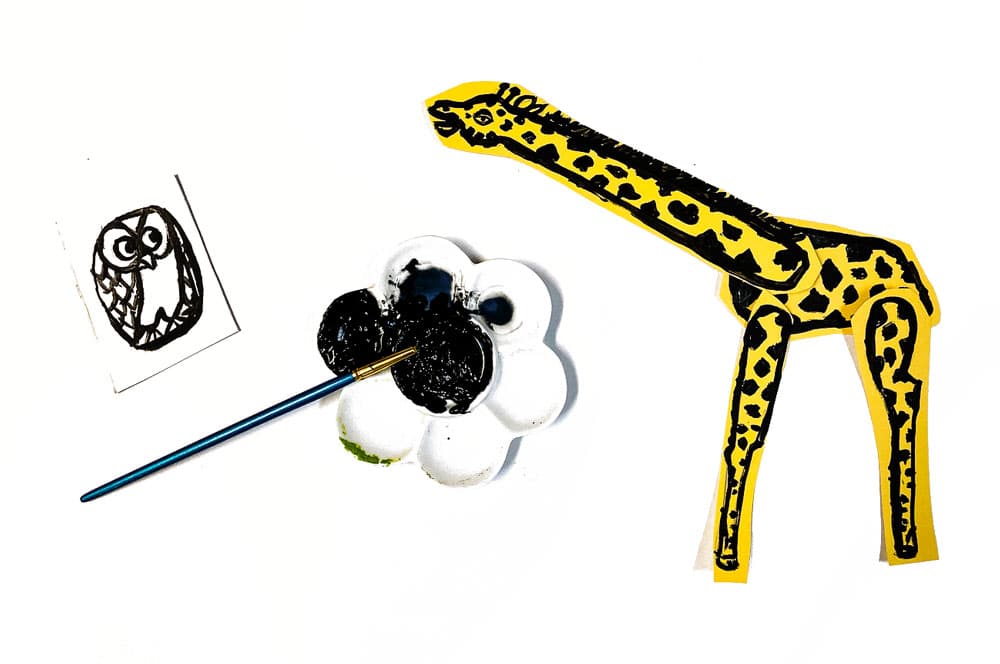
Using some of our favorite Piatti stories for inspiration, we drew our puppets using black paint and a paintbrush.
You can use paint, ink, markers, pastels, colored pencils – any art-making supply you prefer! – to draw your own puppets. We found it was easier to draw some of the more complex animals in pieces – see what works best for you!
For fun, we wanted one of our puppets to have moving parts. Will you make stick puppets, marionettes, or other kinds of puppets?

If you’re making stick puppets as we did, use a piece of tape or hot glue gun to affix a popsicle stick or dowel rod to the back of your puppet. If you have moving pieces you may need more than one!

We thought our show needed an audience, and “hoo” better than one of Piatti’s famous owls! After outlining the drawing of our owl with black paint and letting it dry, we colored it with oil pastels.
You may decide your stage needs some miniature set pieces, a handmade backdrop, scrap fabric curtains…what would you add to make your Piatti puppet show one-of-a-kind?
This little stage doesn’t fully come to life until the show begins. Use your favorite Celestino Piatti stories or illustrations to spark ideas for puppets and plays that are all your own!
Add a piece of parchment paper across the front to turn this into a handmade shadow puppet theater. Or use this same process to make a BIG cardboard box puppet theater.
Adding handmade puppets and props is half the fun of this puppet theater! Here are some DIY puppet ideas to help you find the best puppet-making method for your little puppeteers…
Time to put on the best darn puppet show this [insert your own venue here] has ever seen…! Here’s the cool thing about puppet shows: they are an independent play-lovers DREAM activity.
Storytelling is an important piece of puppetry! A favorite book or movie, nursery rhymes, fables and fairy tales, songs, a personal story or something straight out of their imagination can all spark the storyline of a creative puppet show for kids.
We’ve built a setting right into our little puppet theater, but what backdrops could be used to help tell the story? You can design a simple backdrop by drawing or pasting pieces right onto poster board or scrap cardboard. You might also want to design some extra props for your puppets to use.
Practice is an important part of putting on a puppet play because it provides the opportunity to consider how each of your puppets will move and sound. When will your characters make their entrances and exits? How can your puppets show emotion? How will your puppets sound? Will they have silly voices? Rehearsal is also a time to decide if you’d like to use music in your show, or add lighting effects (like a flashlight covered with colored transparency for some flashy color effects, or dimmed lights to add to a mood).
Do you know what every good puppet show needs? GREAT MARKETING (ha!). Pull out a pile of paper and some markers to make paper tickets, posters, and even programs.

You can order your own copy of Piatti for Children here on the NorthSouth Books website. As a graphic designer (and general lover of good books) this is one I’ve kept out on my coffee table since it arrived.
It’s been such a joy to notice it catching the eye of friends of all ages, and I’ve had so much fun watching them delightfully flip through the pages, discovering Piatti for themselves!
For quite a while, gorgeously-illustrated picture books have been my go-to baby shower gift, and Piatti for Children has gone straight to the top of my list!

If these projects have inspired you to seek out other designers, illustrators, artists, and architects who may be new to you, be sure to visit our process art play tile project – inspired by designer Ray Eames. There’s also an Eva Hesse-influenced yarn mobile, and our nod to the amazing artist Sophie Taeuber-Arp with this kinetic paper shape art. Or deconstruct rainbows while learning about artist Frank Stella.

Comments are closed.


This is a great idea for a puppet theater! I would love to make one myself.